Using Piwik for Web Analytics in Sandstorm (with a HAProxy reverse proxy!)
But first: Why??
- None of that crappy Google Analytics spam bot stuff. Look at all these fake referers (this is a screenshot of my Google Analytics page):

Interestingly, some of those hits showed up even after I removed Google Analytics from my blog…
Anyway, not a single bot or sketchy referer has showed up in my Piwik analytics. My guess is that the bot writers haven’t deemed it worthwhile to go after Piwik users – at least not yet.
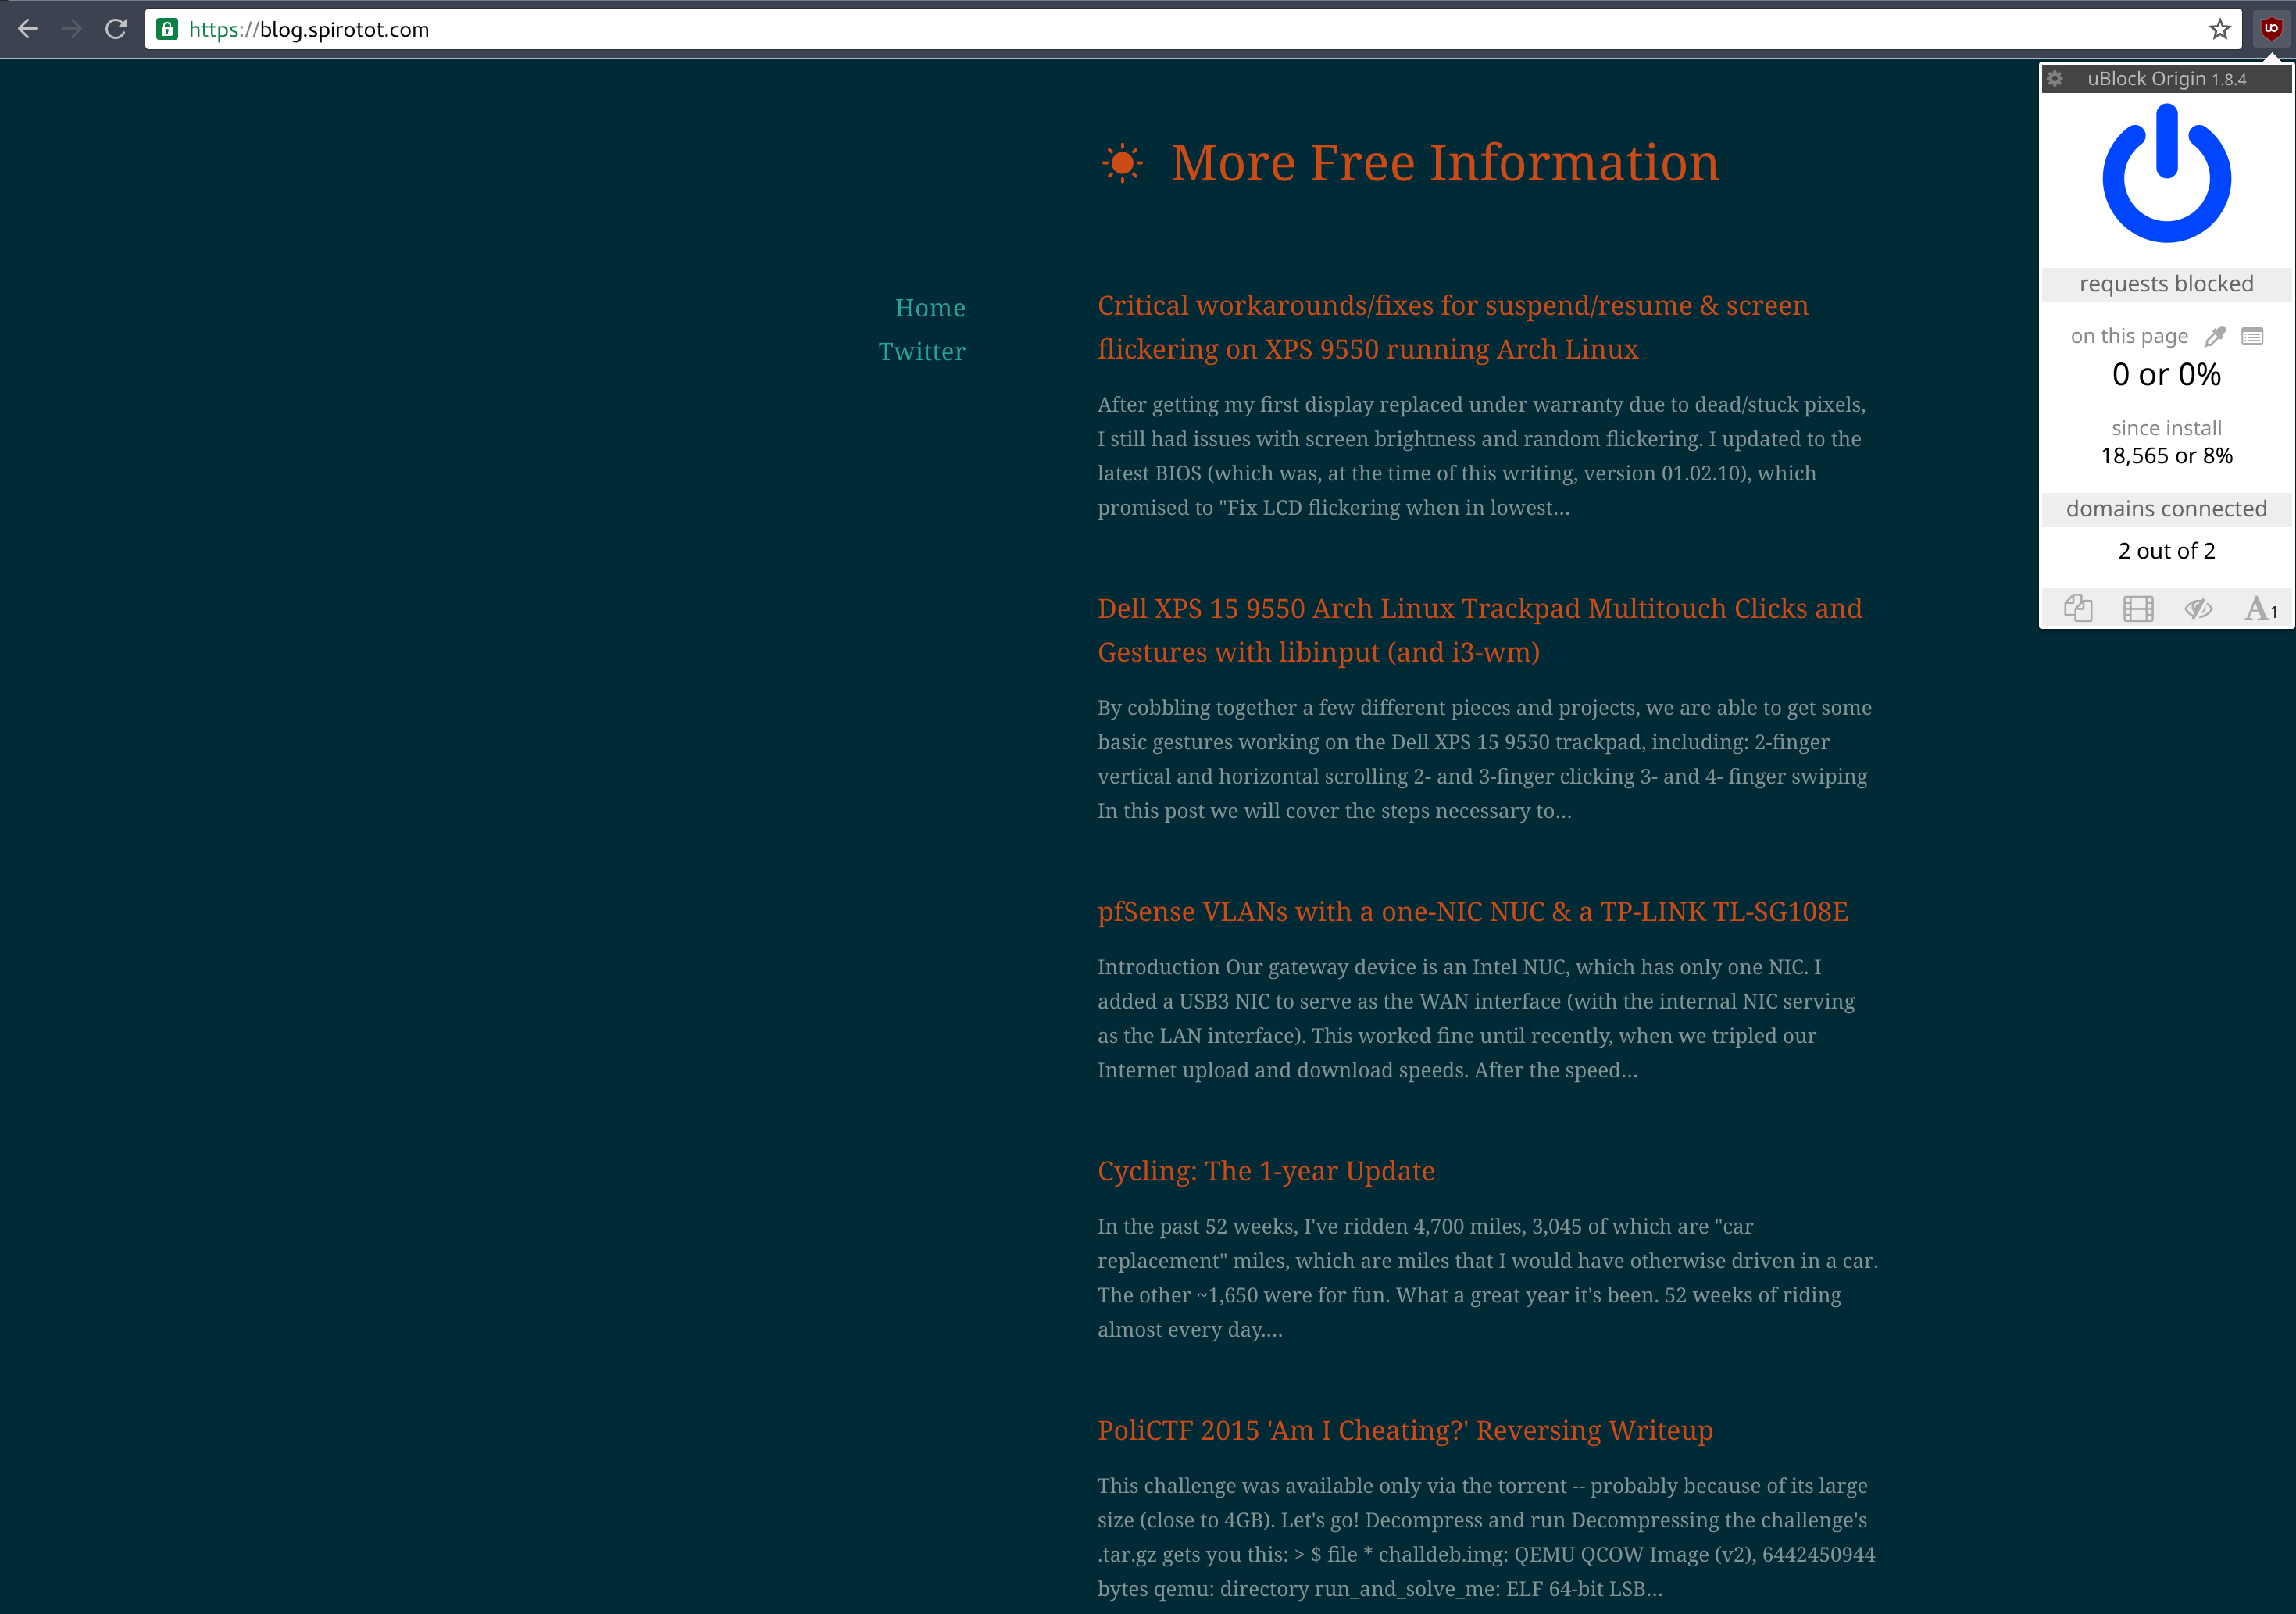
- Accurate results. In addition to weeding out the aforementioned fake referals, Piwik is also not blocked-by-default by nearly as many ad-blockers. Check this out, even the highly-recommended, super-efficient uBlock Origin doesn’t block Piwik on my website by default:
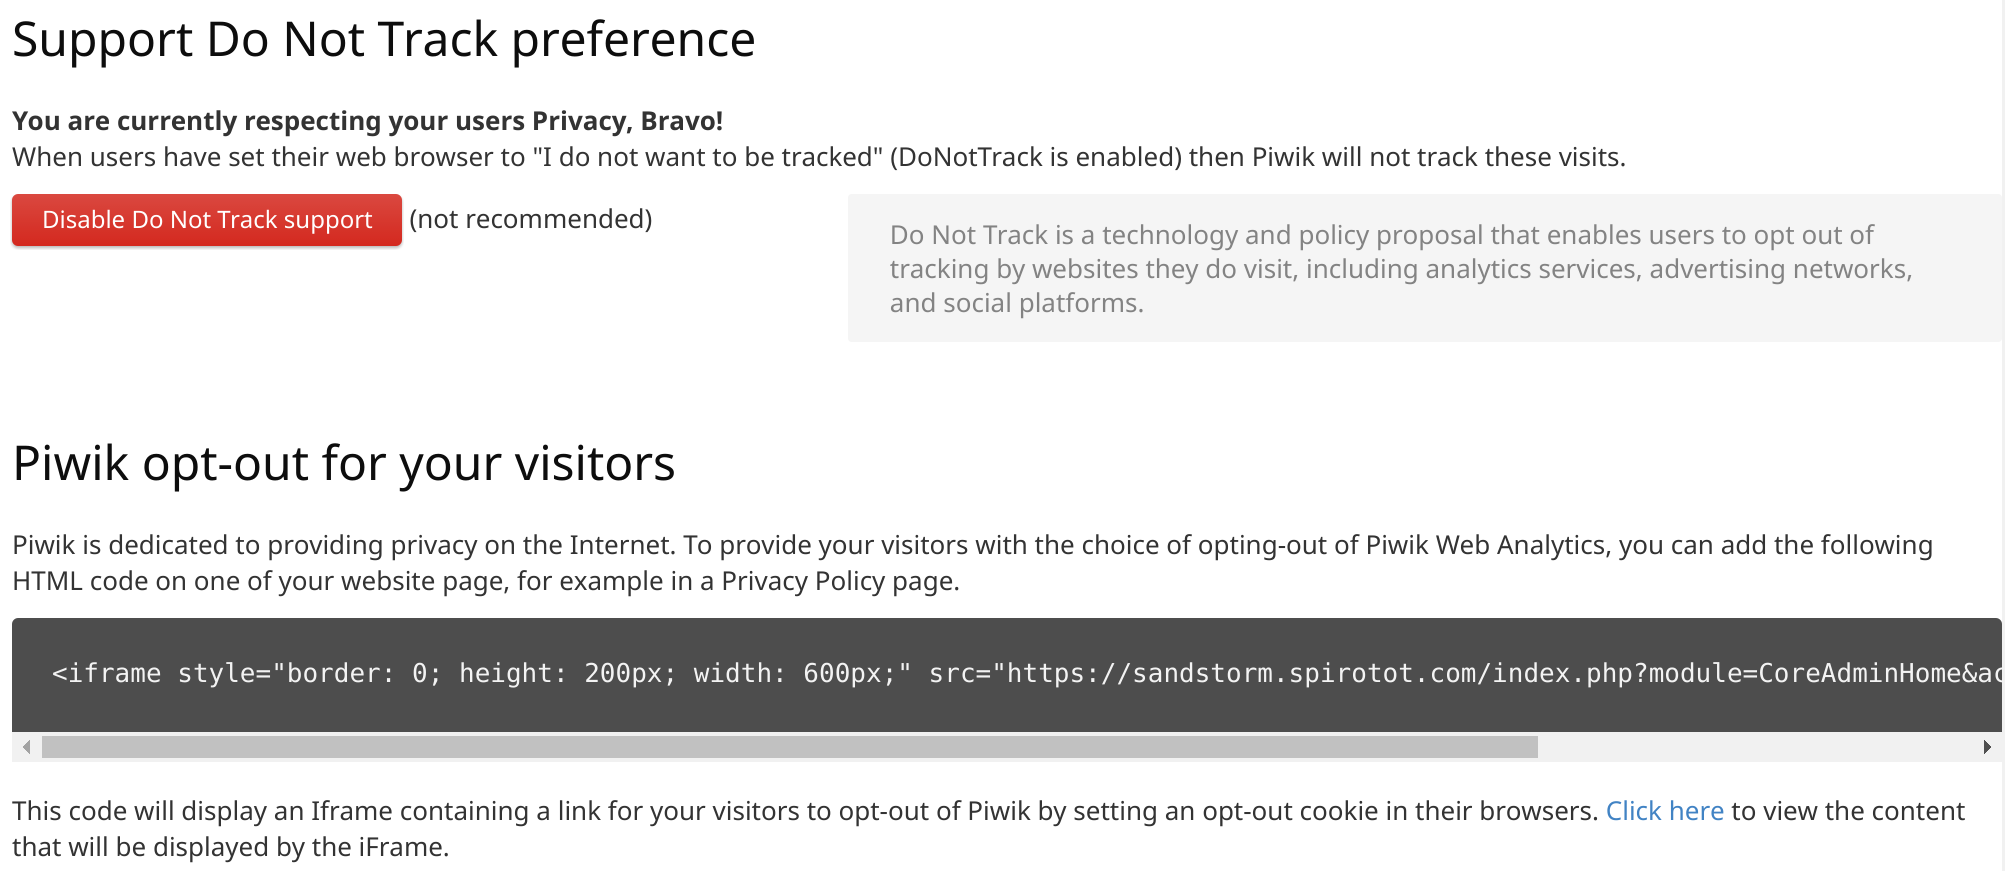
- Privacy. Piwik is self-hosted, so simply put, Google does not get to peek into the collected data. Additionally, the Piwik developers take privacy seriously. With Piwik, it’s easy to respect visitors’ Do Not Track header, as well as allow users to opt out of your analytics:
The Setup
My blog is a Ghost Grain running on my Sandstorm server. My server is actually a virtual machine, which is self-hosted via Proxmox… but that’s for another blog post. The cool thing about this setup is that I have access to the regular Ghost editor (i.e. a dynamic website) via Sandstorm, but whenever I ‘publish’ a post, the entire public-facing part of the blog is converted into totally static HTML. Look, there’s no login page or anything: https://blog.spirotot.com/ghost/. I really like this setup because it strikes me as being not only fairly secure, but also very fast in terms of page load times, especially considering it’s self-hosted, with no caching, on a relatively wimpy virtual machine.
EDIT (7/23/17): My blog is still self-hosted, but now it’s a Docker image, not a Sandstorm grain.
But, because this thing is self-hosted, I only have 1 IP address to share between all of my servers. So I need what’s called a reverse proxy to proxy (that is, direct) incoming connections from the public Internet (like you) to the appropriate backend server inside my LAN. In a way it’s a bit like NAT, but you’re initiating the connection, not me. Anyway, my gateway device is a pfSense box, and I had been using the Squid package to reverse-proxy my websites for quite some time, until it just quit working altogether in one of the more recent pfSense updates. So, I had no choice but to switch over to HAProxy… but I’ve been pleasantly surprised with it. It seems faster than Squid, and is definitely more stable/reliable.
I’m making a few assumptions here:
- You have a dedicated machine for hosting Sandstorm
- You run pfSense as your gateway
- You have a domain name
- You know how to set up Dynamic DNS
1. Sandstorm
There are plenty of good tutorials out there for setting up Sandstorm, so I’m not actually going to cover it here. Sandstorm is super easy to install (and maintain – it updates itself!), so just check out this link. From here on, we’re going to assume that you have Sandstorm installed/accessible on your local LAN… but not immediately accessible from the Internet. We’ll get to that.
2. The site to analyze
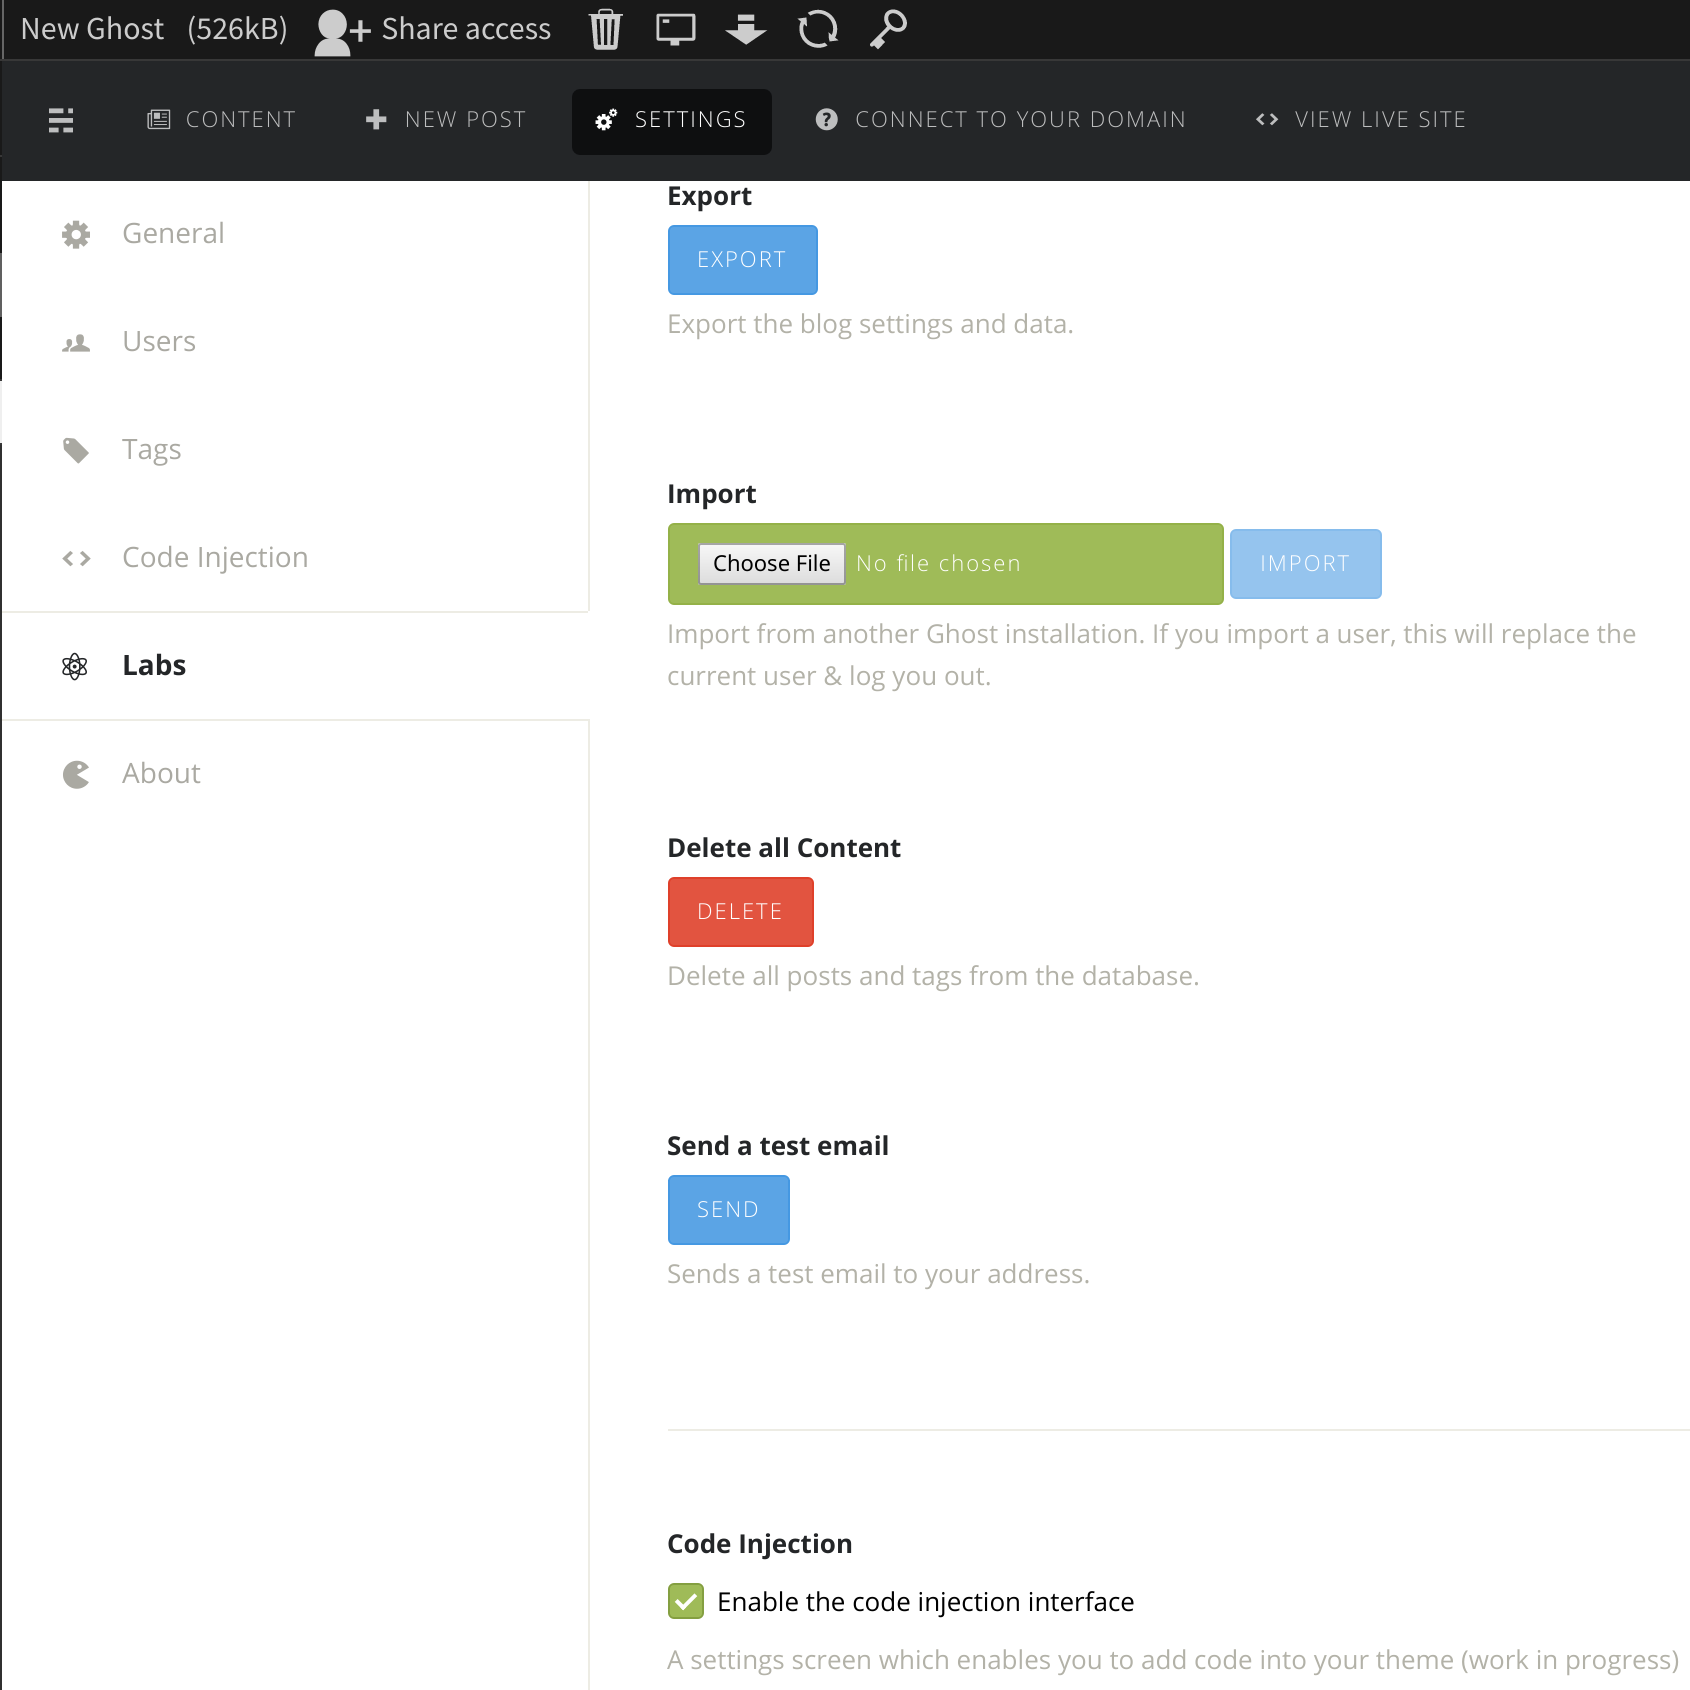
Once you have Sandstorm installed, go ahead and install the Ghost app and the Piwik app! Start by creating a new Ghost grain/instance, and then navigate to the Settings tab. Click the Labs option in the left sidebard, and then check the Enable code injection interface option:
Now create a new Piwik grain, and open it – you should see a page like this:
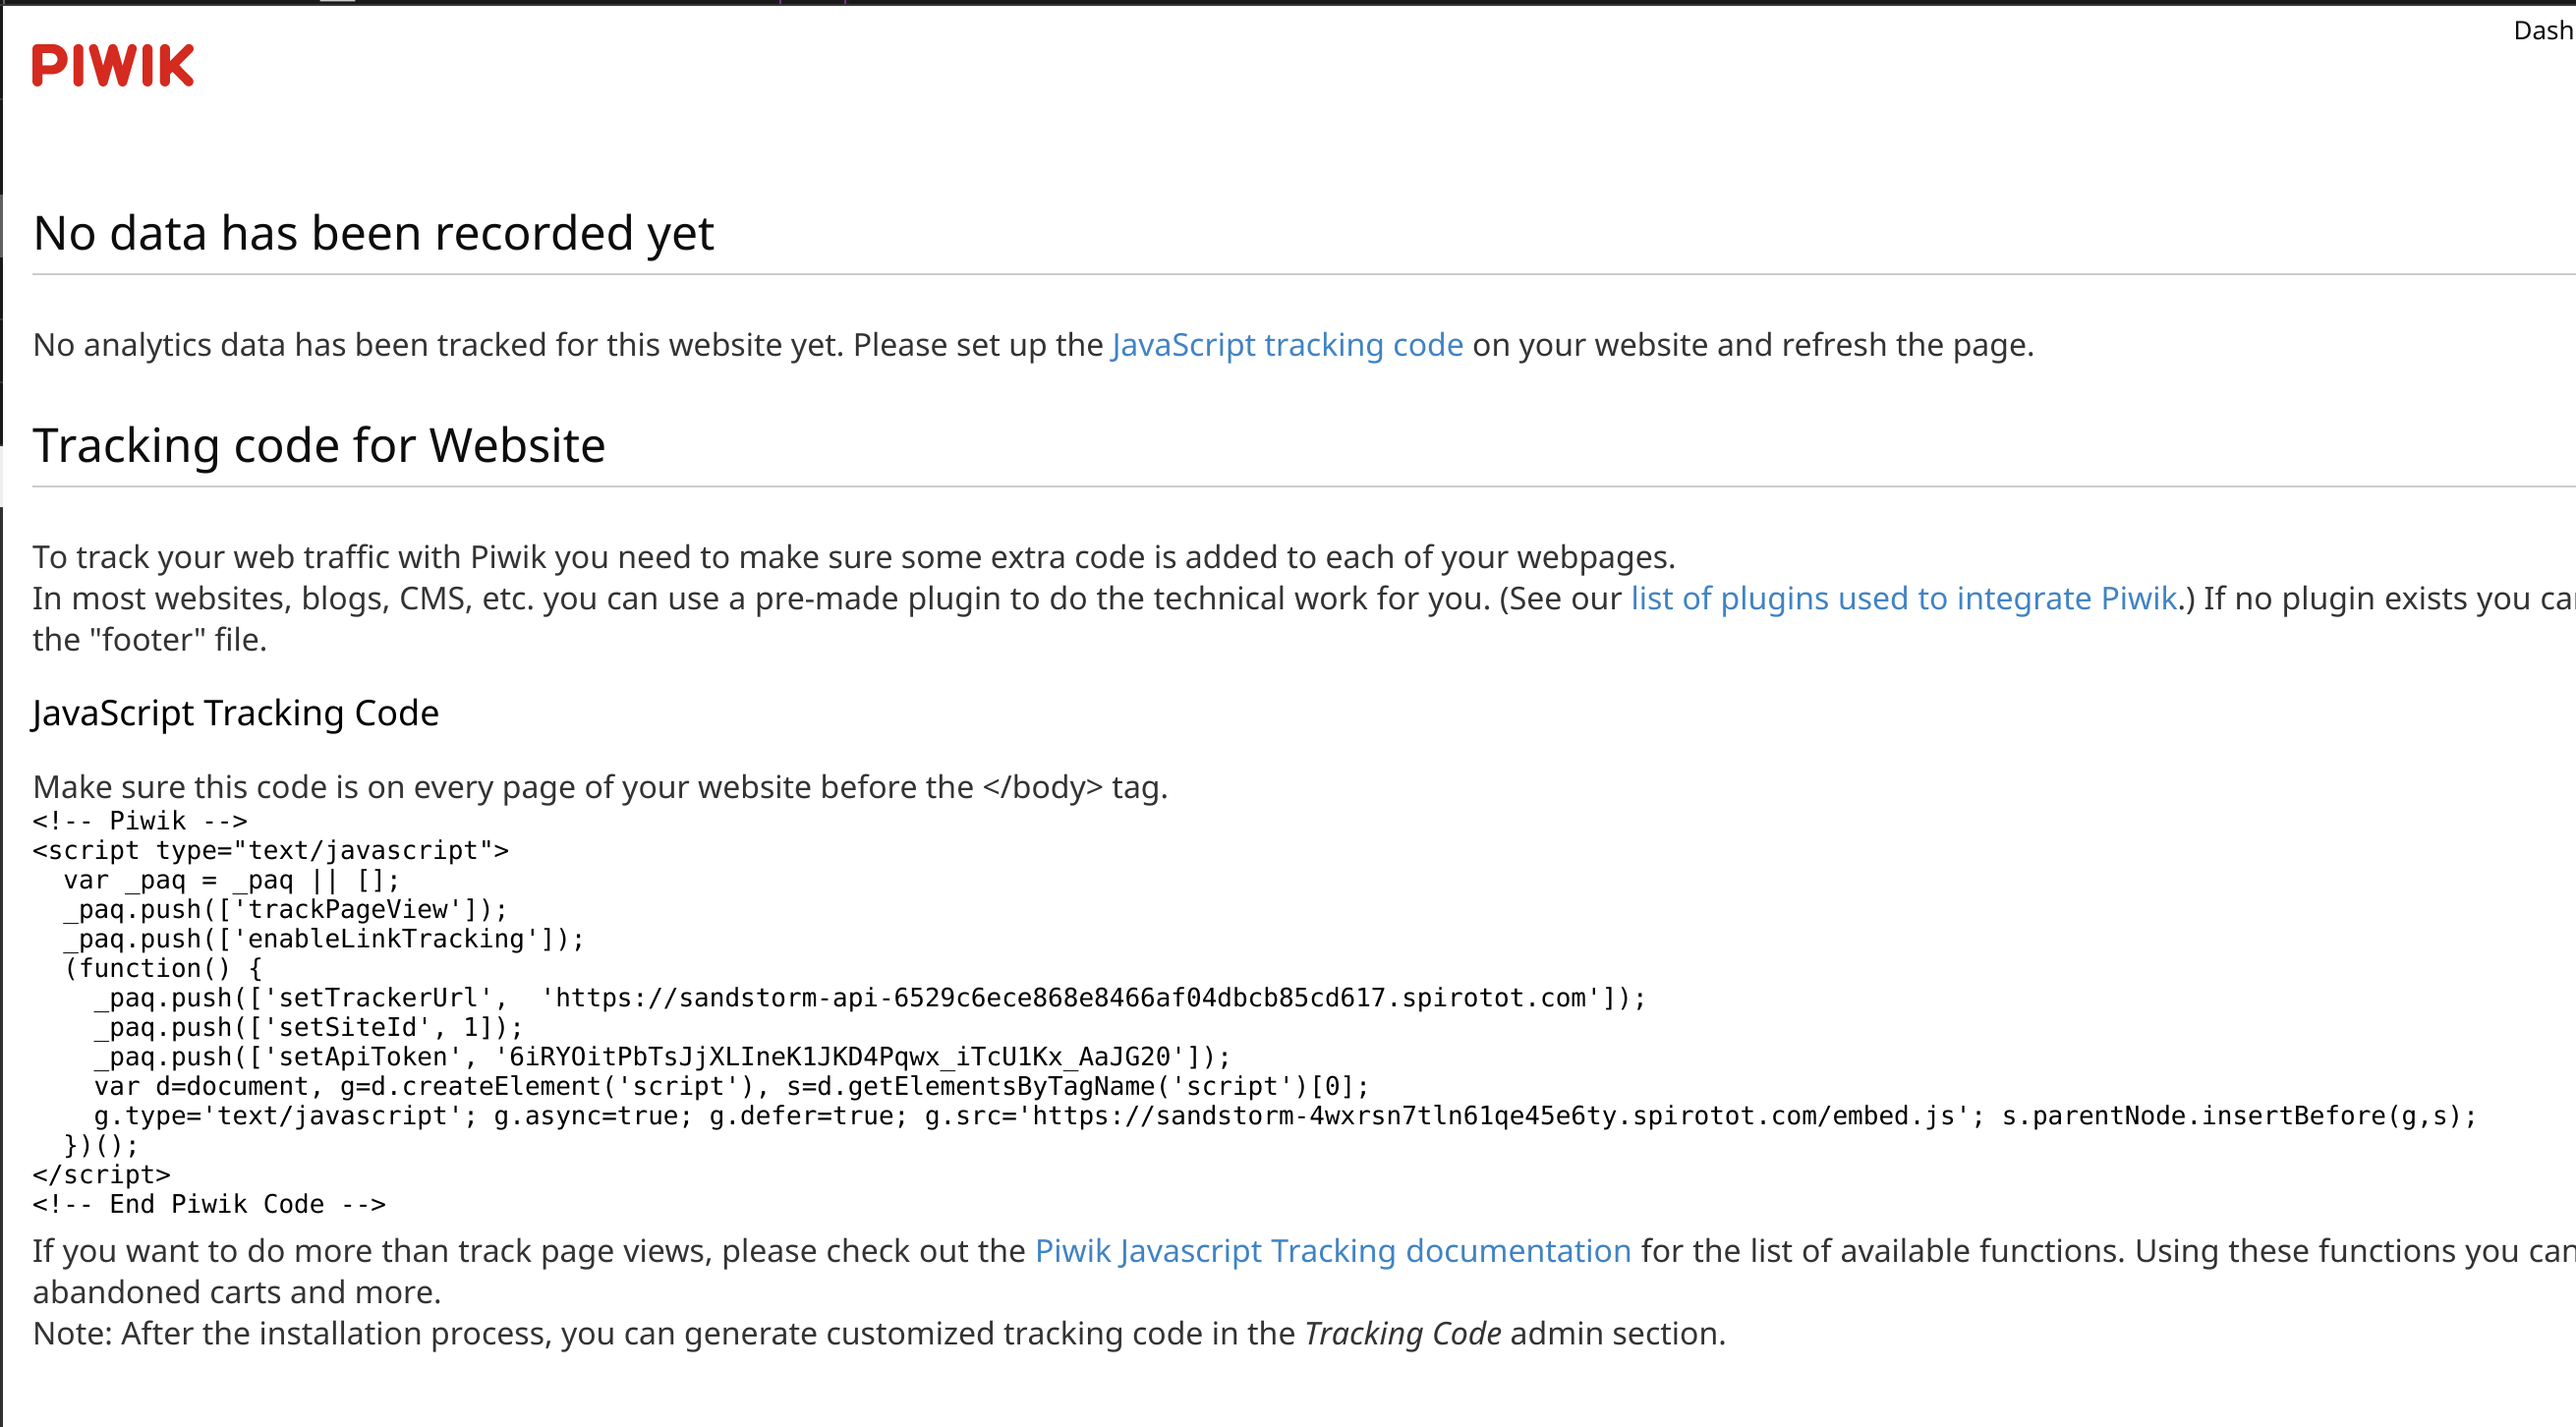
Note the JavaScript code there… you’ll want to copy that into your clipboard, then go back to the Ghost grain’s Settings tab, and click the Code Injection option in the left sidebar. Paste the JavaScript in the Blog Header box. Don’t forget to hit Save!
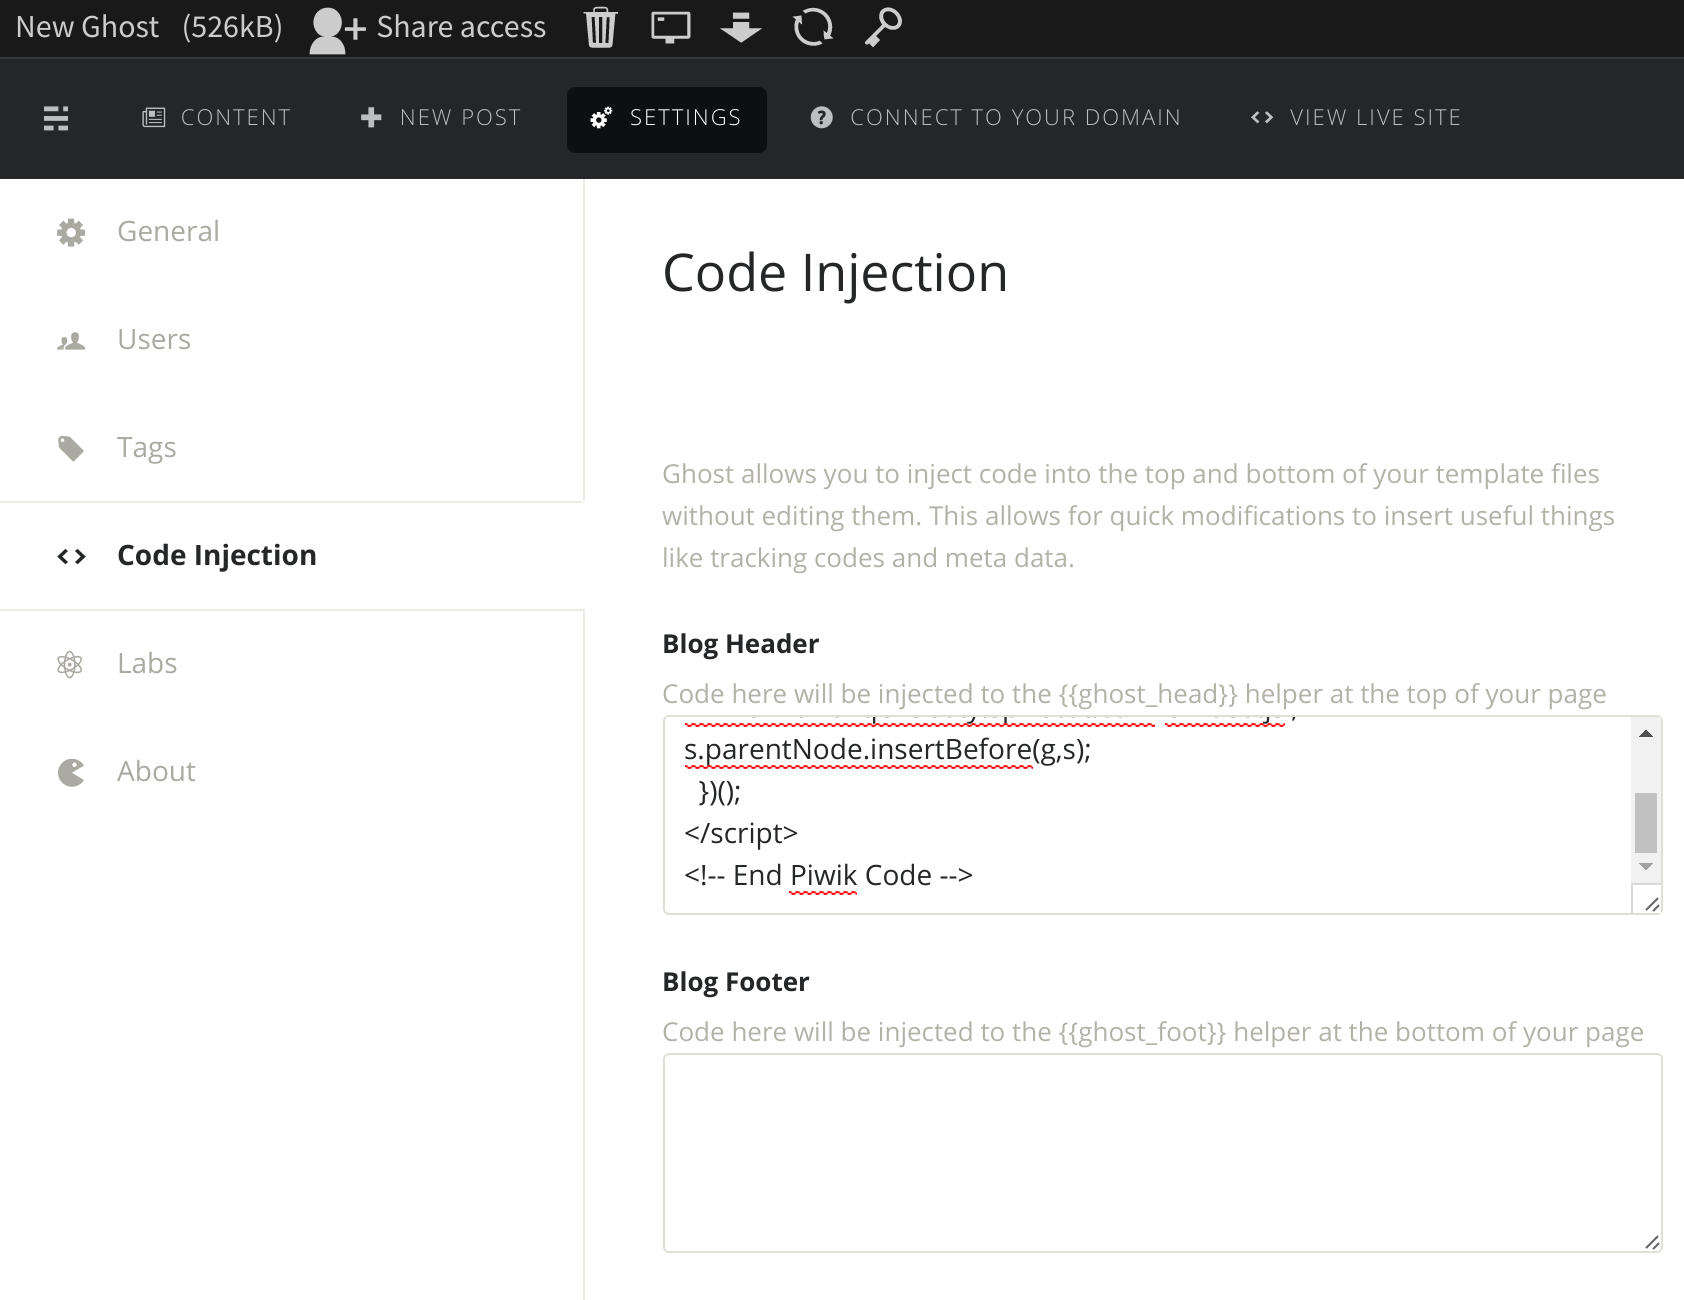
Next, click the Connect To Your Domain tab in the Ghost grain, and add the displayed DNS records to your domain. This is a very important step. Basically, this will tell Sandstorm that a friendly domain name (like blog.spirotot.com) maps to the actual random subdomain used by Sandstorm for the static Ghost pages. If you want to read more about this, you might check out this page: https://docs.sandstorm.io/en/latest/administering/wildcard/
And that’s it for the Blog/Piwik side, for now at least!
3. HAProxy
Now we just need to configure HAProxy in pfSense. If you haven’t installed the HAProxy package on your pfSense box, that would be the first step!
Once you have it installed, open the Services menu, and click on HAProxy to visit the HAProxy settings/configuration page. If you look at the tabs in the HAProxy settings page, you’ll see Frontend and Backend. They are fairly self-expanatory: frontends are the internet-facing side of HAProxy, and control which ports HAProxy runs on, SSL, etc. Backends are internal (i.e. on your LAN) servers you want incoming clients from the Internet to be able to connect to. You set up rules for how the incoming clients should be directed in the Frontends settings.
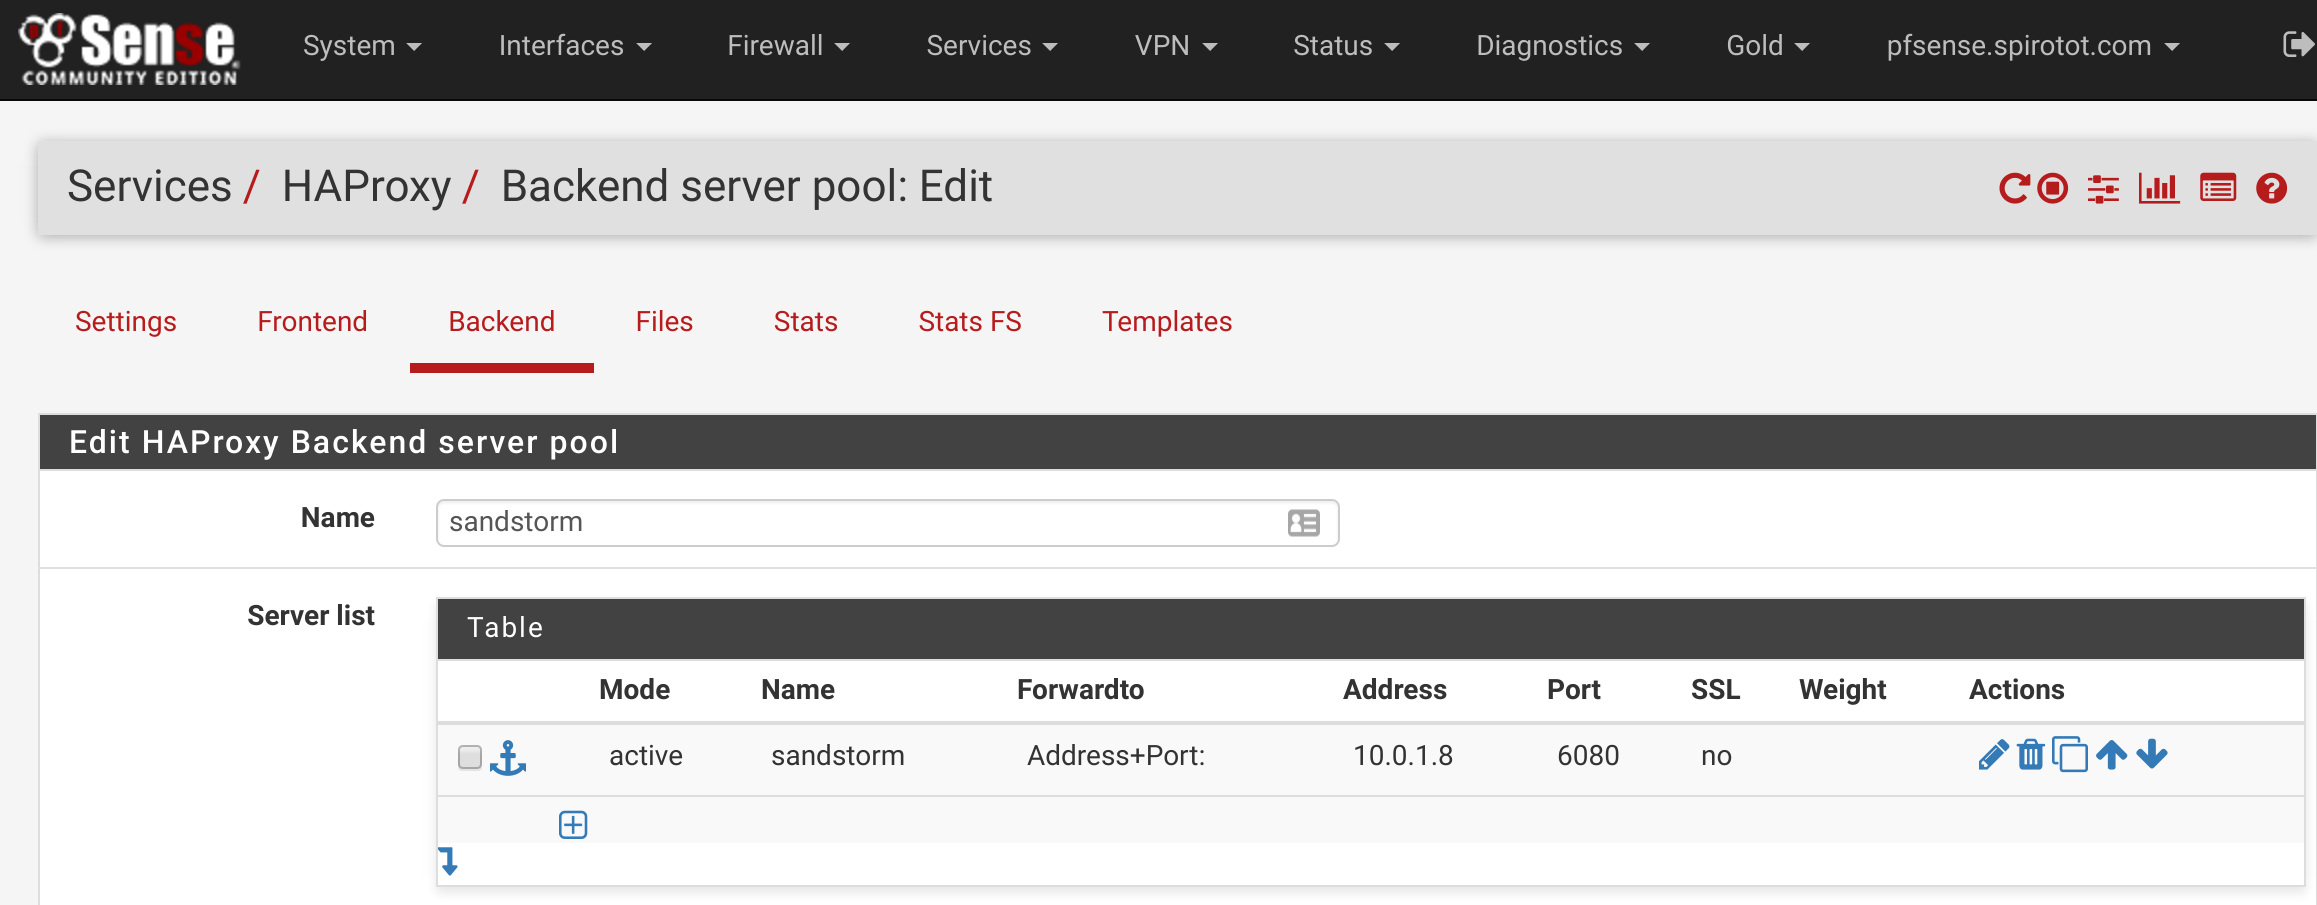
We’ll configure the Backends first, so click on the Backends tab, and then click the green Add button to add a new Backend. This is super easy – just name your Backend something reasonable (.e.g sandstorm), and then add the information needed to contact your Sandstorm server to the Server list section. Mine is at internal IP 10.0.1.8, and runs on port 6080. Yours will probably be different. All other options are default. Scroll down to the bottom and click Save.
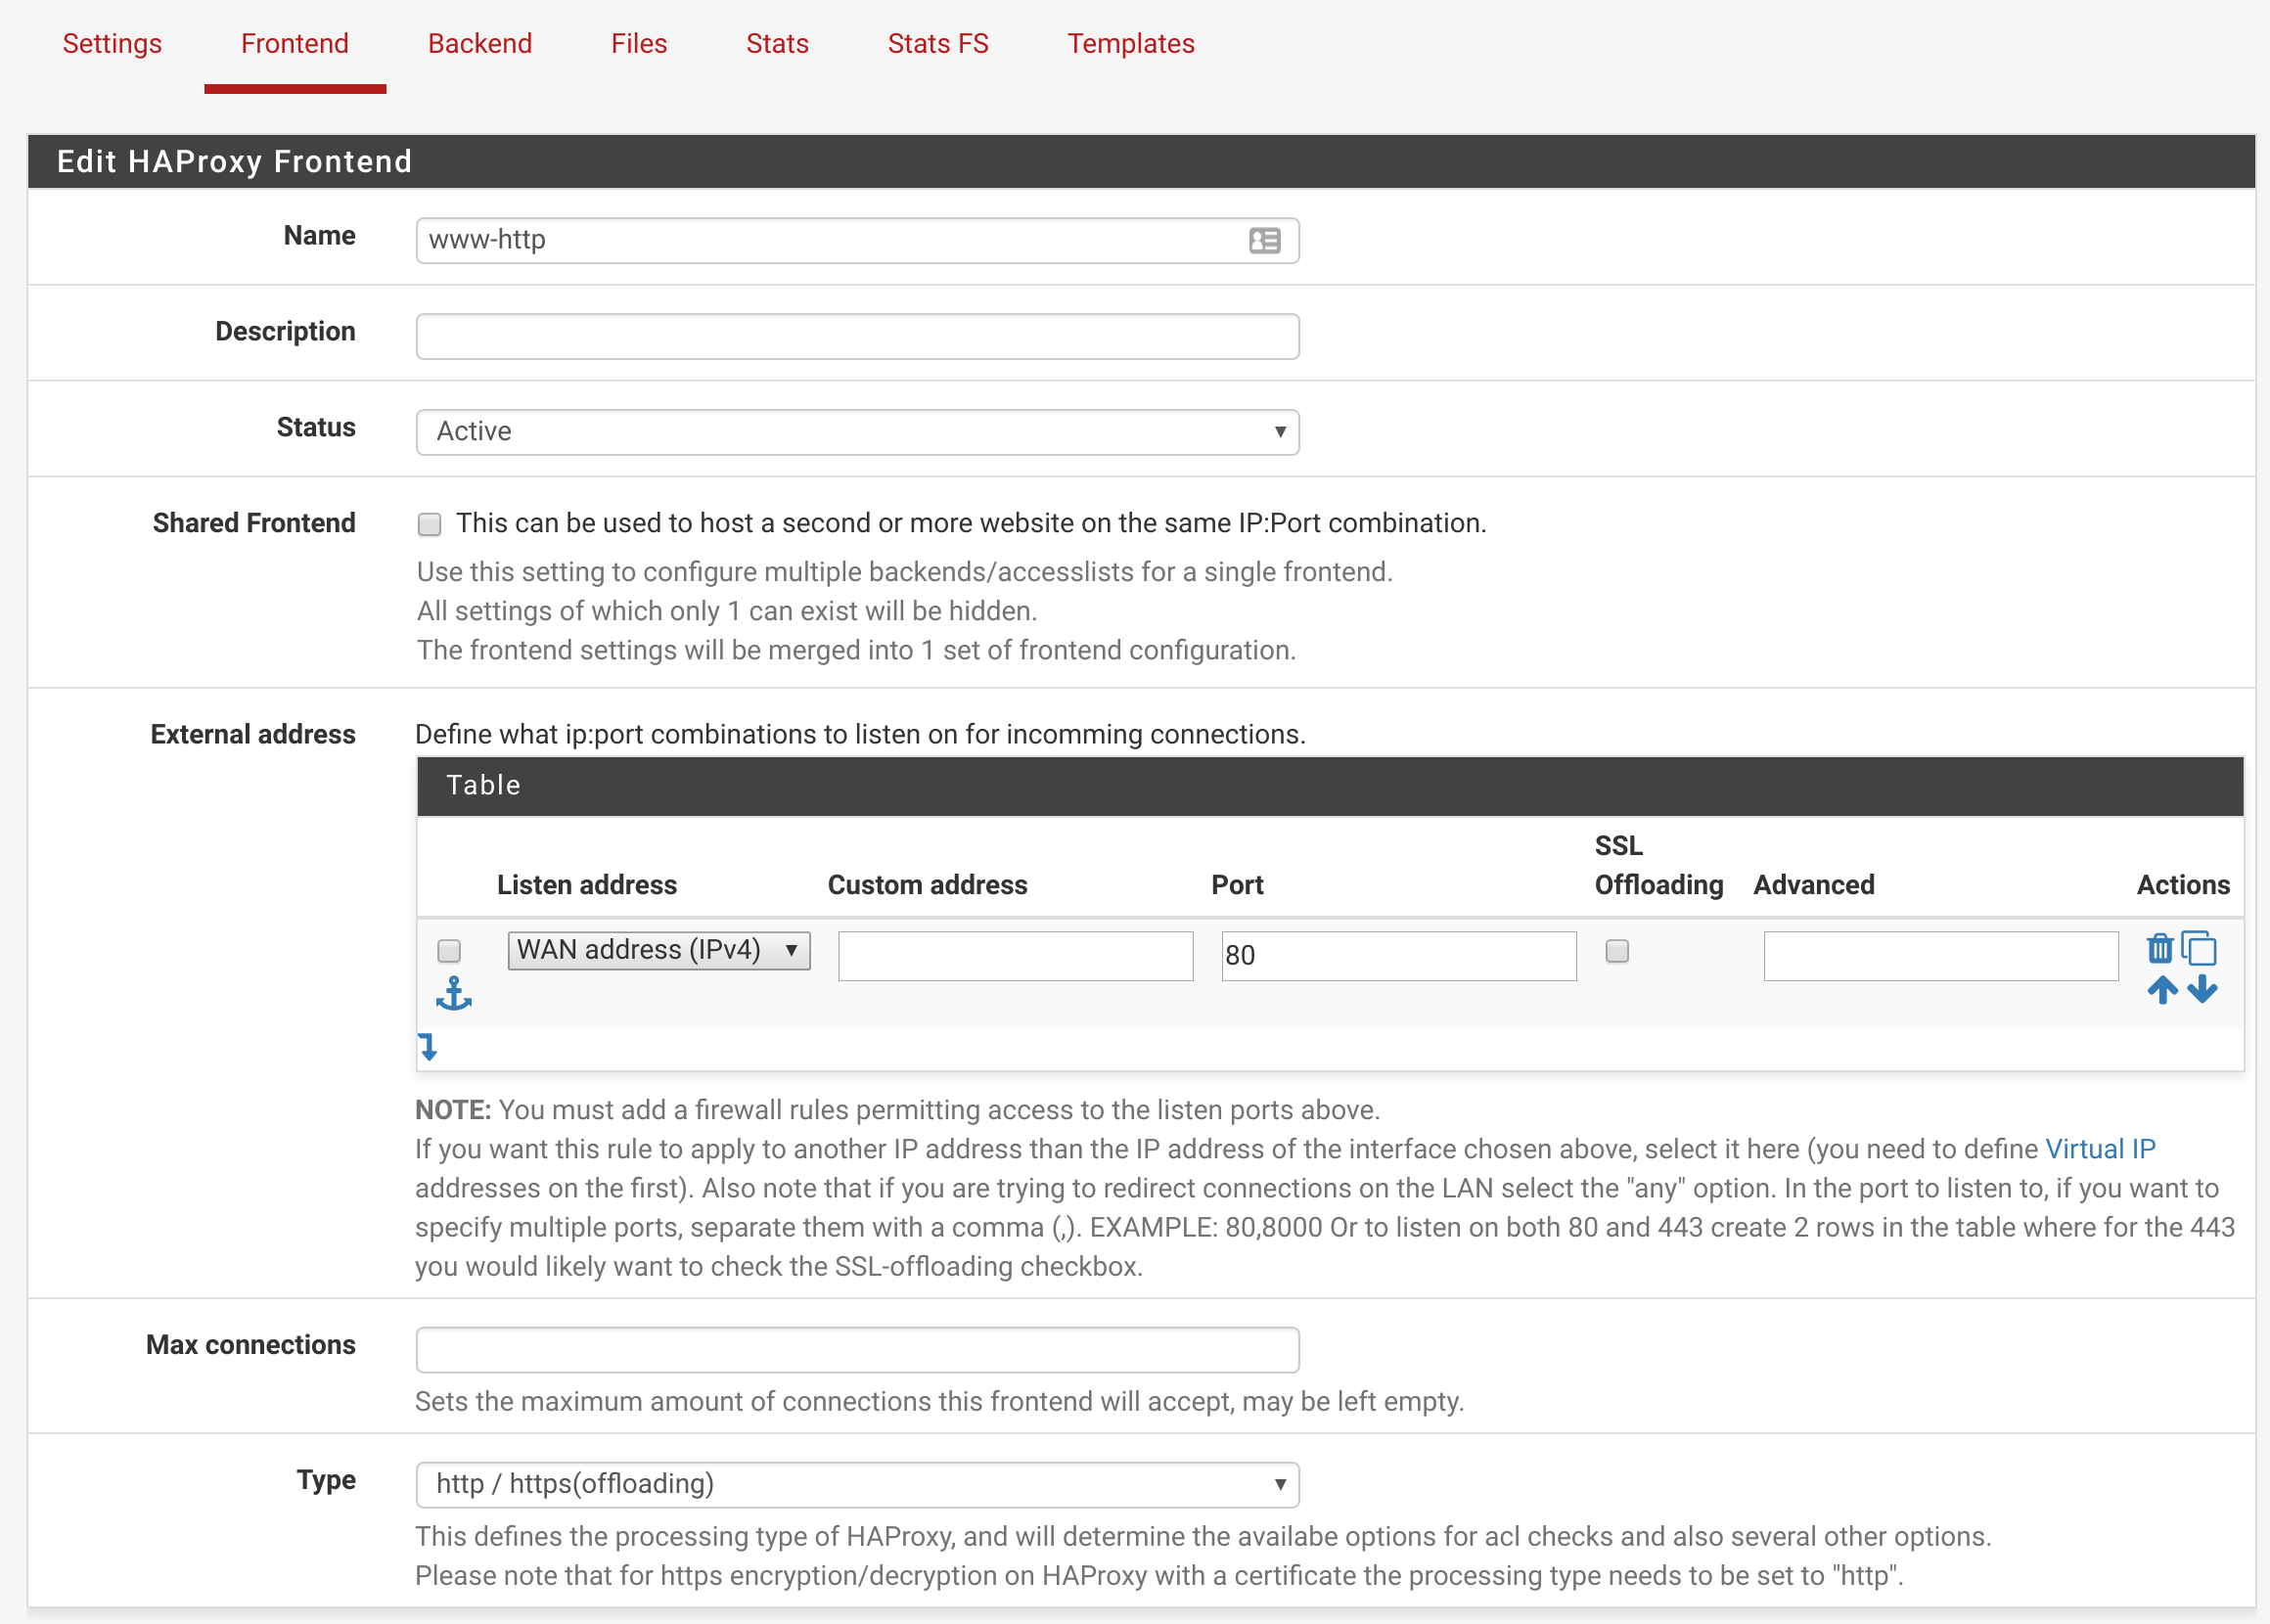
Now we’ll configure the Frontends. I’m assuming you’re not using HTTPS, but the configuration for HTTPS is basically identical. Click on the Frontends tab, and click the green Add button. Name your frontend something reasonable (I named mine www-http), and ensure the settings match the following screenshot:
Next, scroll down to the Default backend, access control lists and actions section. This is where we’ll configure the rules that direct incoming clients to your Sandstorm server. My Sandstorm domain name is sandstorm.spirotot.com, so you’ll have to adjust for your domain name/Sandstorm configuration accordingly – it may take some trial and error. I have 4 Access control lists items related to my Sandstorm, and they are all using the Host HTTP header to direct incoming clients to the appropriate location:
 ^— This one directs incoming clients to the main sandstorm interface (https://sandstorm.spirotot.com).
 ^— This one directs incoming clients to individual apps/grains in Sandstorm, which are always a random 32-character subdomain (hence the
 .{32}).
 ^— This one directs incoming clients to static pages, which are always a random (but static) 20-character subdomain.
 ^— This one directs incoming clients to the blog (https://blog.spirotot.com).
Note that I was a bit pedantic in my rule setup –I named each rule (except for the first two) different things so I can easily remember what the rule is for. You could name them all the same, if you wanted, and save yourself some time in the next step.
Once you have your incoming rules configured, scroll down a little until you see Actions. This is where we’ll assign actions to be taken whenever one of those rules is matched. I have 3 actions (because I had 3 uniqe rule names across my 4 rules: sandstorm-request, sandstorm-static-request, and ghost-blog-request-sandstorm):


Basically, the logic is, “if [ruleX] is true, direct to [backendY]”, where ruleX is either sandstorm-request, sandstorm-static-request, and ghost-blog-request-sandstorm, and backendY is always (in our case) sandstorm.
One last thing! To get IP addresses of the incoming visitors to show up in Piwik, we need to tell HAProxy to append an X-Forwarded-For HTTP header to the requests it proxies from the client to the Sandstorm server. Scroll down to the Advanced Settings section, and make it look like this:
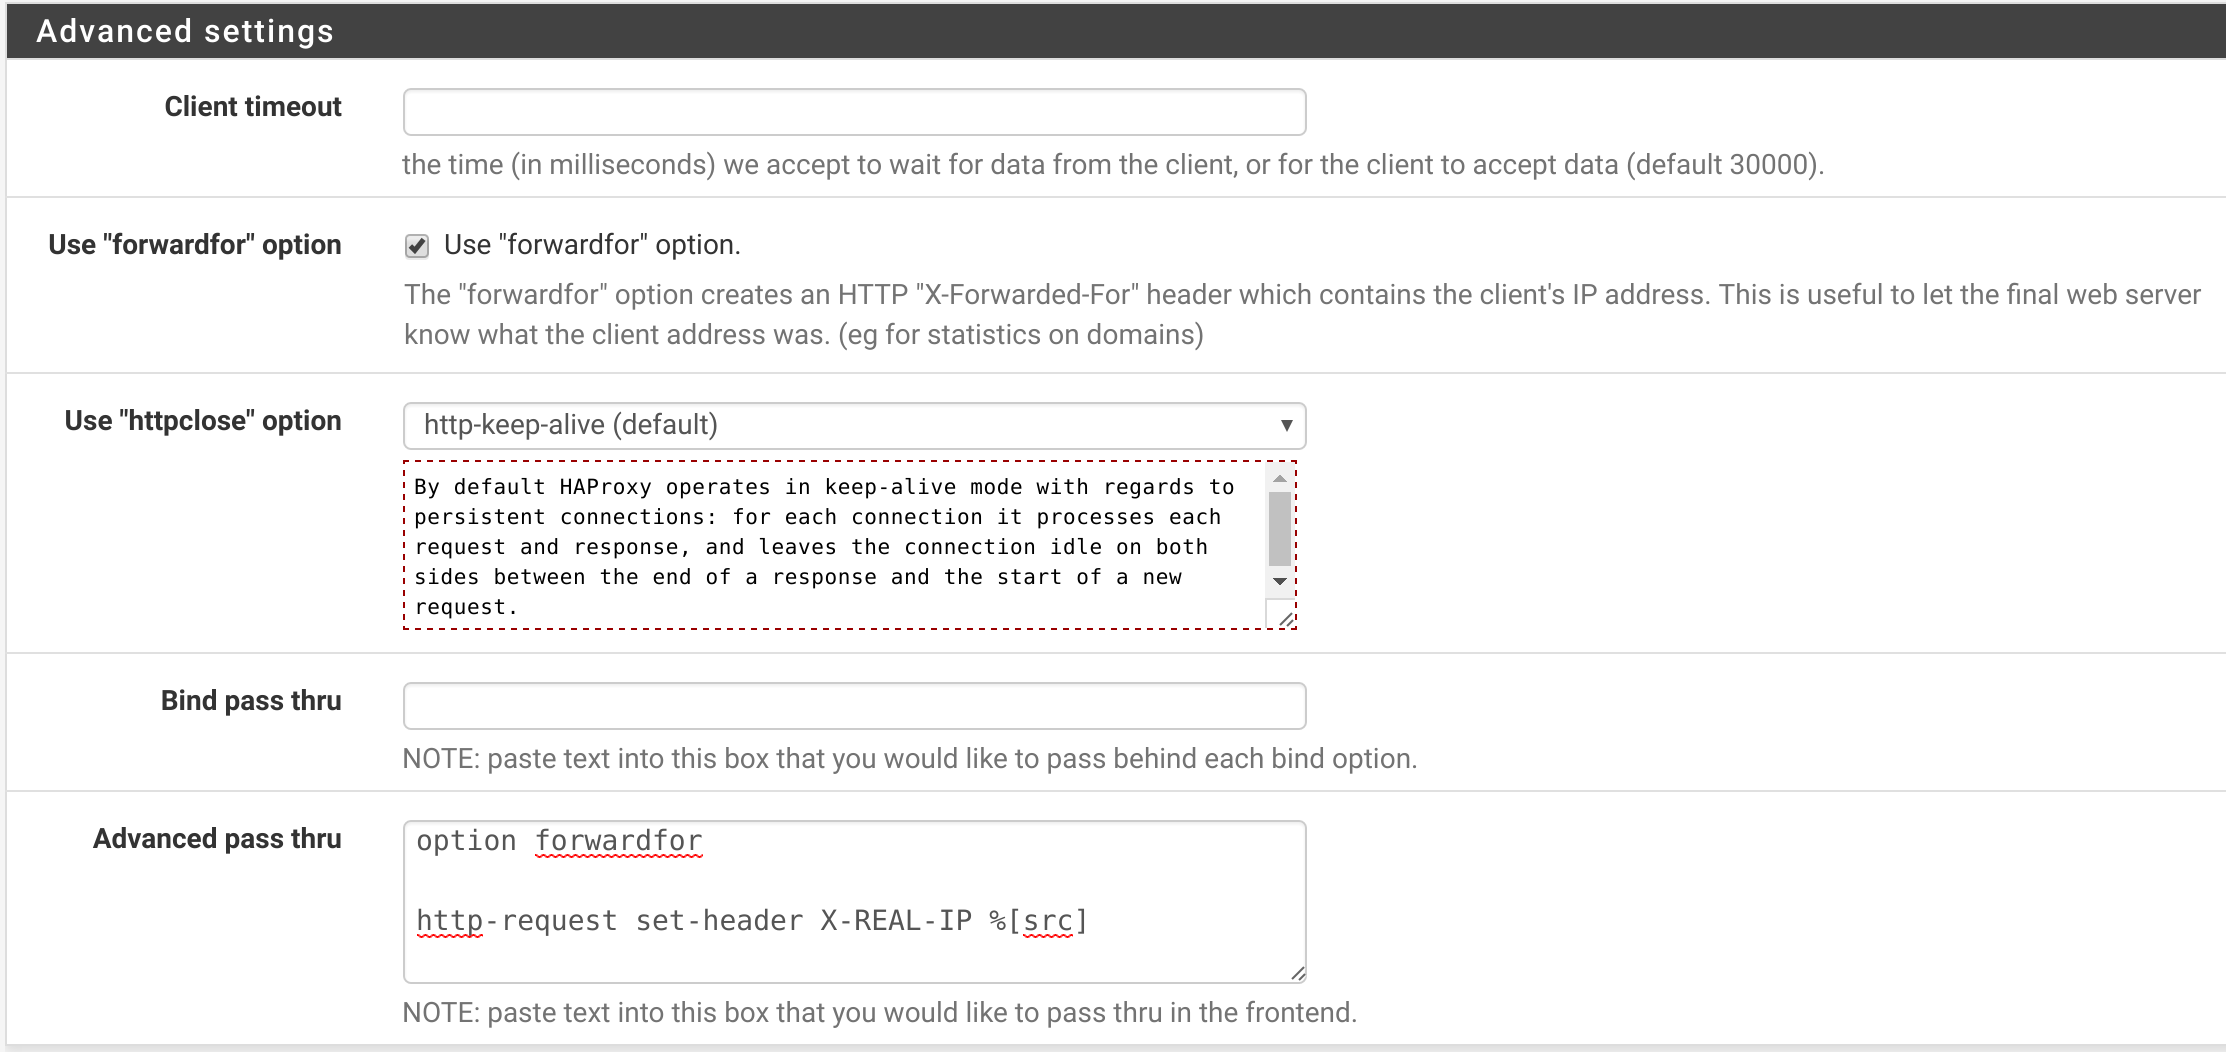
The text to put in the Advanced pass thru box is:
| |
Ok, now scroll down to the bottom and hit Save.
Next, I’d recommend recommend adding the following to your Global Advanced Passthrough box on the main HAProxy Settings page to increase security of the default SSL settings:
| |
Hit Save again.
You may need to restart HAProxy. Except for any troubleshooting (i.e. misconfigured DNS, misconfigured Sandstorm), you’re done!